Description
1. Power Connection and Startup
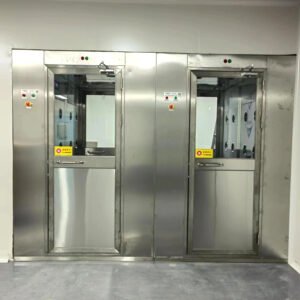
Connect to a 380V, 50Hz power supply. Turn on the “Power” and “Lighting” switches. Confirm that the fan and lighting system are working properly. At this point, the cargo air shower is in its initial state and ready for normal operation.
2. Entry/Exit Procedure
Entry Procedure:
-
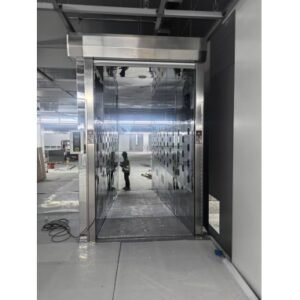
Press the manual button to open the entry door → The door opens automatically → Enter the air shower chamber.
-
If the anti-pinch sensor on the inner side of the entry door does not detect any person or object within 5 seconds, the door will close automatically.
-
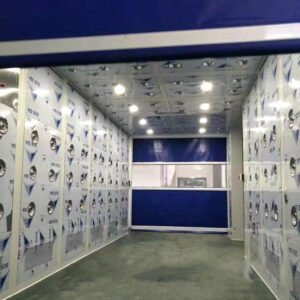
The person or object stands in the air shower detection area → Air shower starts with a wind speed of 20–25 m/s (shower duration adjustable from 10 to 99 seconds; factory default is 15 seconds).
-
After the air shower ends → Exit door opens automatically → Person or object leaves the air shower chamber.
-
If the anti-pinch sensor at the exit does not detect any person or object within 5 seconds → Exit door closes automatically → Process completed.
Exit Procedure:
-
Press the manual button to open the exit door → The door opens automatically → Enter the air shower chamber.
-
If the anti-pinch sensor at the exit door does not detect anyone within 5 seconds → Door closes automatically → Entry door opens automatically.
-
Person or object leaves the air shower chamber → If the exit anti-pinch sensor detects no presence within 5 seconds → Entry door closes → Process completed.
3. Precautions
-
After power is supplied to the air shower, the two doors are interlocked. Do not force one door open while the other is not completely closed.
-
Do not open doors during the air shower process. In case of emergency, press the emergency stop button to stop the shower and then open the door.
-
The emergency stop button will reset automatically after 3–4 minutes. The system will enter sleep mode. Press any key to restore normal operation.
-
During maintenance (or when opening the panel), ensure safety by switching off the power supply and removing the fuse. Confirm that there is no electrical power before performing any work.
-
Do not force open the front door after the air shower ends.
-
The air shower must be operated by trained personnel. Once the nozzles are positioned, do not move them without authorization.
4. Main Interface: Operation Screen
-
Press ESC to cut off all outputs (valid only on the main screen).
-
Press ALM to turn off lighting output (valid only on the main screen).
-
When power is supplied, the power indicator will light up (valid only on the main screen).
-
When the fan is running, the work indicator will light up (valid only on the main screen).
Use the up/down keys to navigate to the second screen.
5. Second Interface: Parameter Settings
-
Press 0, then ENT to enter the password screen. Enter the password 999 using direction keys (numbers cannot be input directly). Press ENT to confirm. Press ESC to return to the second screen. Press SET to choose a data field, input the desired value, then press ENT to confirm.
-
Air shower time range: 0.3–999.9 seconds
-
Lighting time range: 18–3600 seconds
-
Exit door delay range: 0.1–20 seconds
-
Entry door delay range: 0.3–20 seconds
If the entered data is out of range, a buzzer will sound.
Navigate to the third screen using the up/down keys.
6. Third Interface: Production Settings
-
Choose the desired data field and input the target value. Press ENT to confirm. After data is successfully modified, press SET until the cursor disappears.
-
Production quantity range: 1–99
-
Production date range: 2000–9999
Out-of-range values will trigger a buzzer.
Navigate to the fourth screen using the up/down keys.
7. Fourth Interface: Fault Diagnosis
-
When the entry door is closed, the magnetic sensor indicator changes from white to black. When the exit door is closed, the same applies.
-
When the photoelectric switch is triggered, its indicator turns from white to black.
-
When the entry door lock is energized, its indicator changes to black. The same applies for the exit door lock.
-
When the air shower is active, its indicator turns black.
-
When lighting is on, the lighting indicator turns black.
Navigate to the fifth screen using the up/down keys.
8. Fifth Interface: Consumable Dimensions
-
Choose the target field and input the desired value. Press ENT to confirm. After the data is modified, press SET until the cursor disappears.
-
Pre-filter size range: Max: 2000×2000×500 mm / Min: 10×10×5 mm
-
HEPA filter size range: Max: 2000×2000×1000 mm / Min: 10×10×5 mm
-
Lighting quantity setting range: 1–99
If the entered value is out of range, a buzzer will sound.
You can navigate between any screens using the up/down keys. Once all data is successfully set, press SET until the cursor disappears. Then press 1, followed by ▼, go to the “Close Password” option, press ENT to confirm the password closure. Return to the main screen, press the ESC Emergency Stop key once to initiate an emergency stop, then press it again to release the stop. All settings are now completed.
9. Common Issues and Troubleshooting
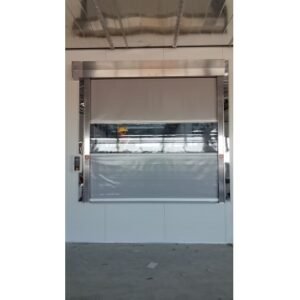
If the high-speed roll-up door cargo air shower malfunctions, refer to the following troubleshooting table for self-diagnosis. If the issue cannot be resolved, please contact our after-sales service team promptly for assistance.
Common Malfunctions and Troubleshooting
| Fault Phenomenon | Possible Cause | Solution |
|---|---|---|
| Low Air Speed | HEPA filter used for too long and clogged | Replace HEPA filter |
| Pre-filter used for too long and clogged | Replace pre-filter | |
| Fan Not Running | Air switch on power line is tripped | Check for tripped circuit breaker or loose wires |
| Electrical components in control box are faulty | Replace faulty electrical components | |
| Fan has been working too long | Replace fan | |
| PLC control system malfunction | Repair PLC control system | |
| Fan Does Not Stop | Timer relay failure | Maintain or replace timer relay board |
| Intermediate relay failure | Replace intermediate relay | |
| Light Not Working | Fluorescent tube damaged | Replace fluorescent tube |
| PLC control system malfunction | Repair PLC control system | |
| Doors Interlocked | Sensor or electric lock signal error due to PLC program | Replace or repair relevant electrical components |
Note: Non-standard customization is acceptable.